Video Dubbing
Create a video dubbing job from a video or audio source file.
Video Dubbing is for translating or replacing speech in a video workflow. Use it when the source is a video and you want the transcript, voice generation, and rendered output managed inside one job.
Before you start
Use the highest-quality video file available. Clear source speech gives the transcript and final dub a stronger starting point.
Check Models before the first job. Video dubbing needs media tools such as ffmpeg and ffprobe, speech recognition, language translation when translating, audio separation for some media, and the selected TTS model.
If the video has strong music or noisy speech, prepare a cleaner vocal track with Voice Isolator before starting the dub when possible.
Create a video dub
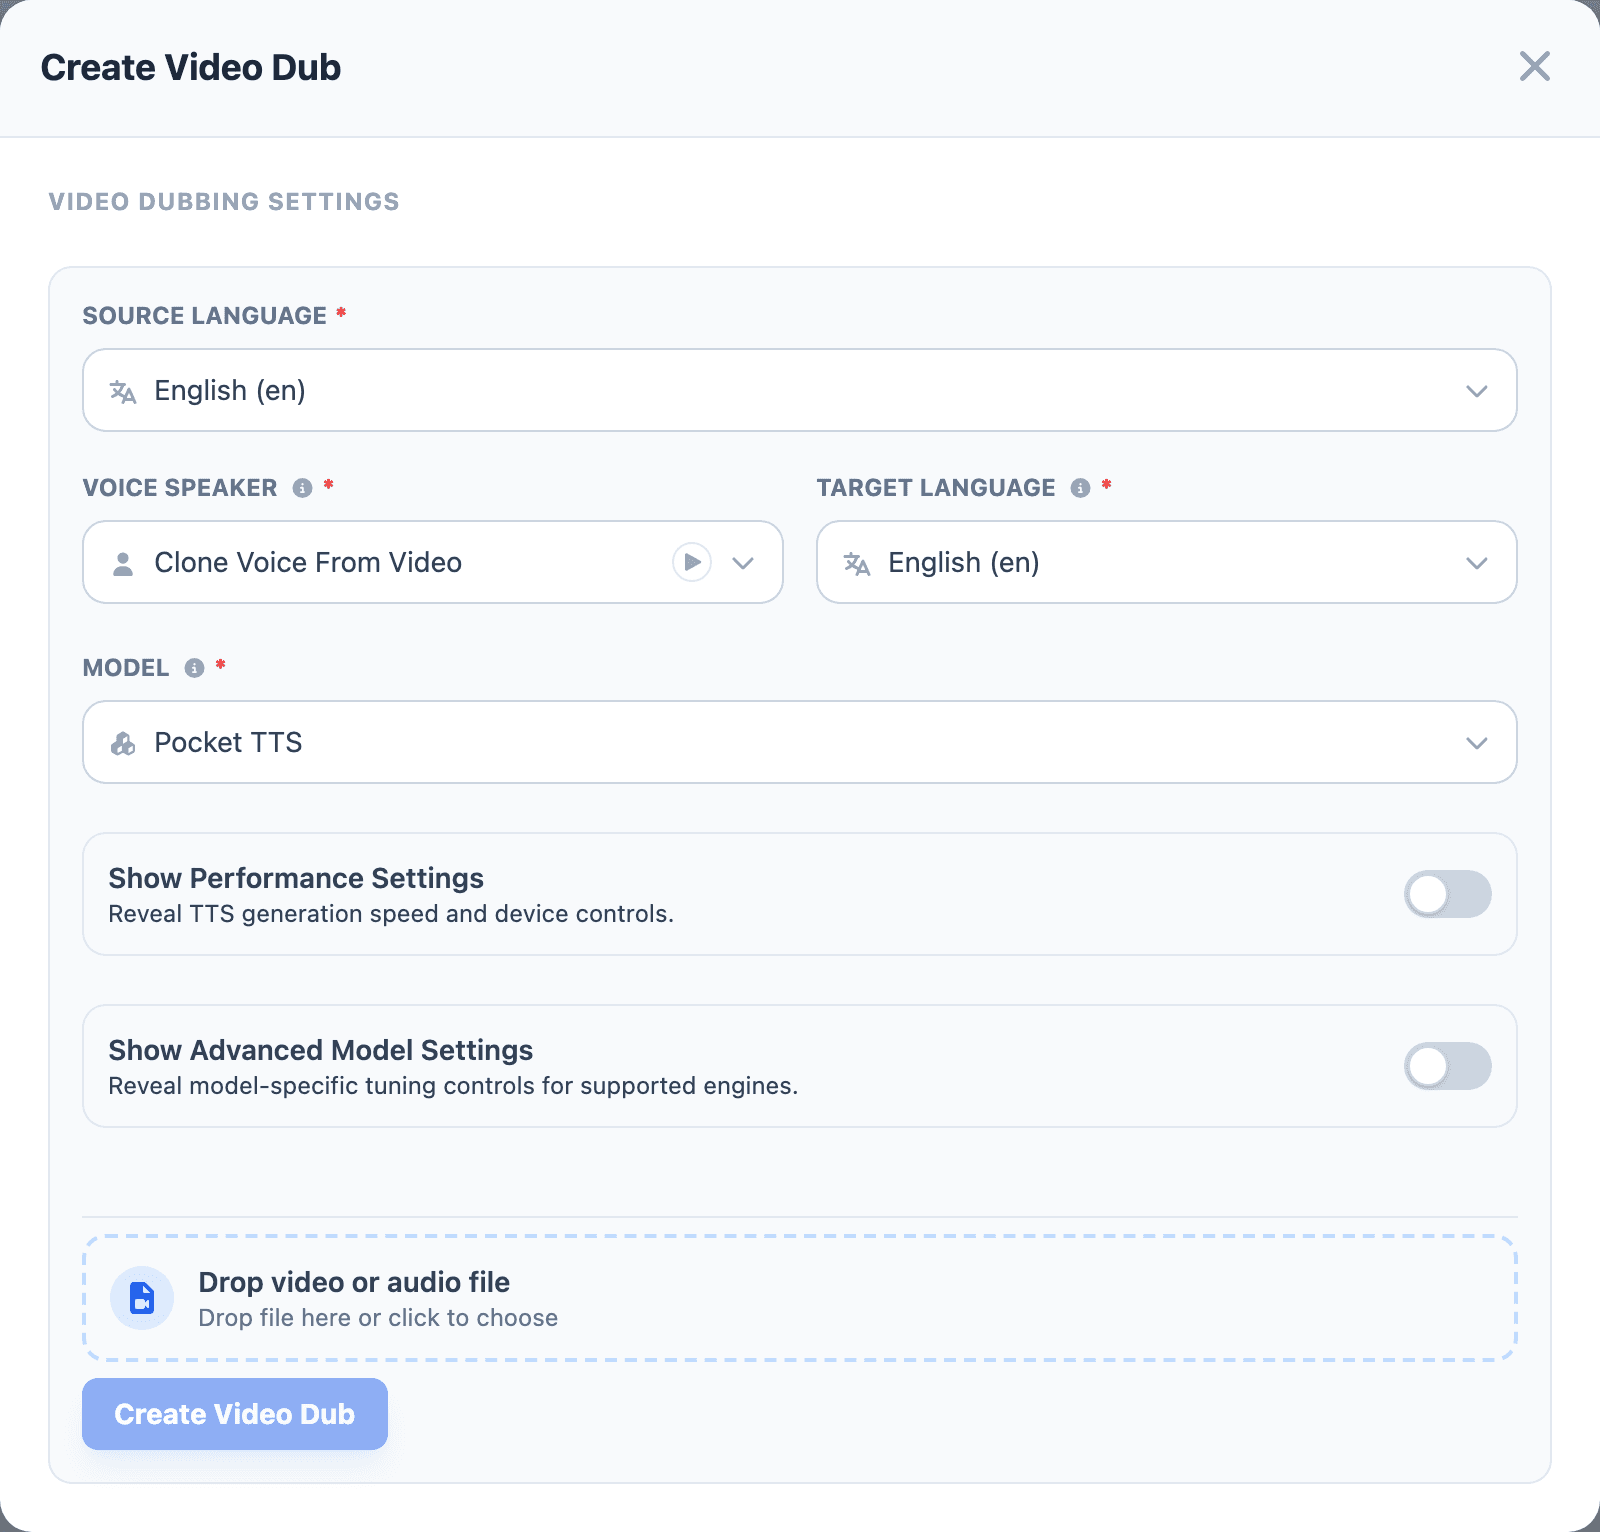
- Open Video Dubbing from the sidebar.
- Select Create Video Dub.
- Choose the Source Language for the original media.
- Choose Voice Speaker. Use Clone Voice From Video when the output should follow the source speaker, or choose a saved voice when the output should use a different speaker.
- Choose the Target Language.
- Choose the generation Model.
- Keep performance and advanced settings unchanged for the first render.
- Drop the video into the upload area, or use the file picker.
- Select Create Video Dub.
Choose Clone Voice From Video when the dubbed output should preserve the source speaker's voice identity. Choose a saved voice when the final video should use a narrator, actor, or brand voice from your library.
The performance and advanced model controls are the same controls used in Studio. See Studio before tuning workers, device, Qwen batch size, or model-specific settings.
Use defaults for the first render setup. If the source video has background music or noisy speech, consider preparing a cleaner vocal track with Voice Isolator before creating the dub.
Choose the voice strategy
Use Clone Voice From Video when viewers should still recognize the original speaker. This fits creator videos, interviews, and training clips where speaker continuity matters.
Choose a saved voice when the final video should sound like a narrator, actor, or brand voice from your library. This fits product videos, onboarding, marketing clips, and lessons where a consistent voice matters more than matching the original speaker.
Review and render
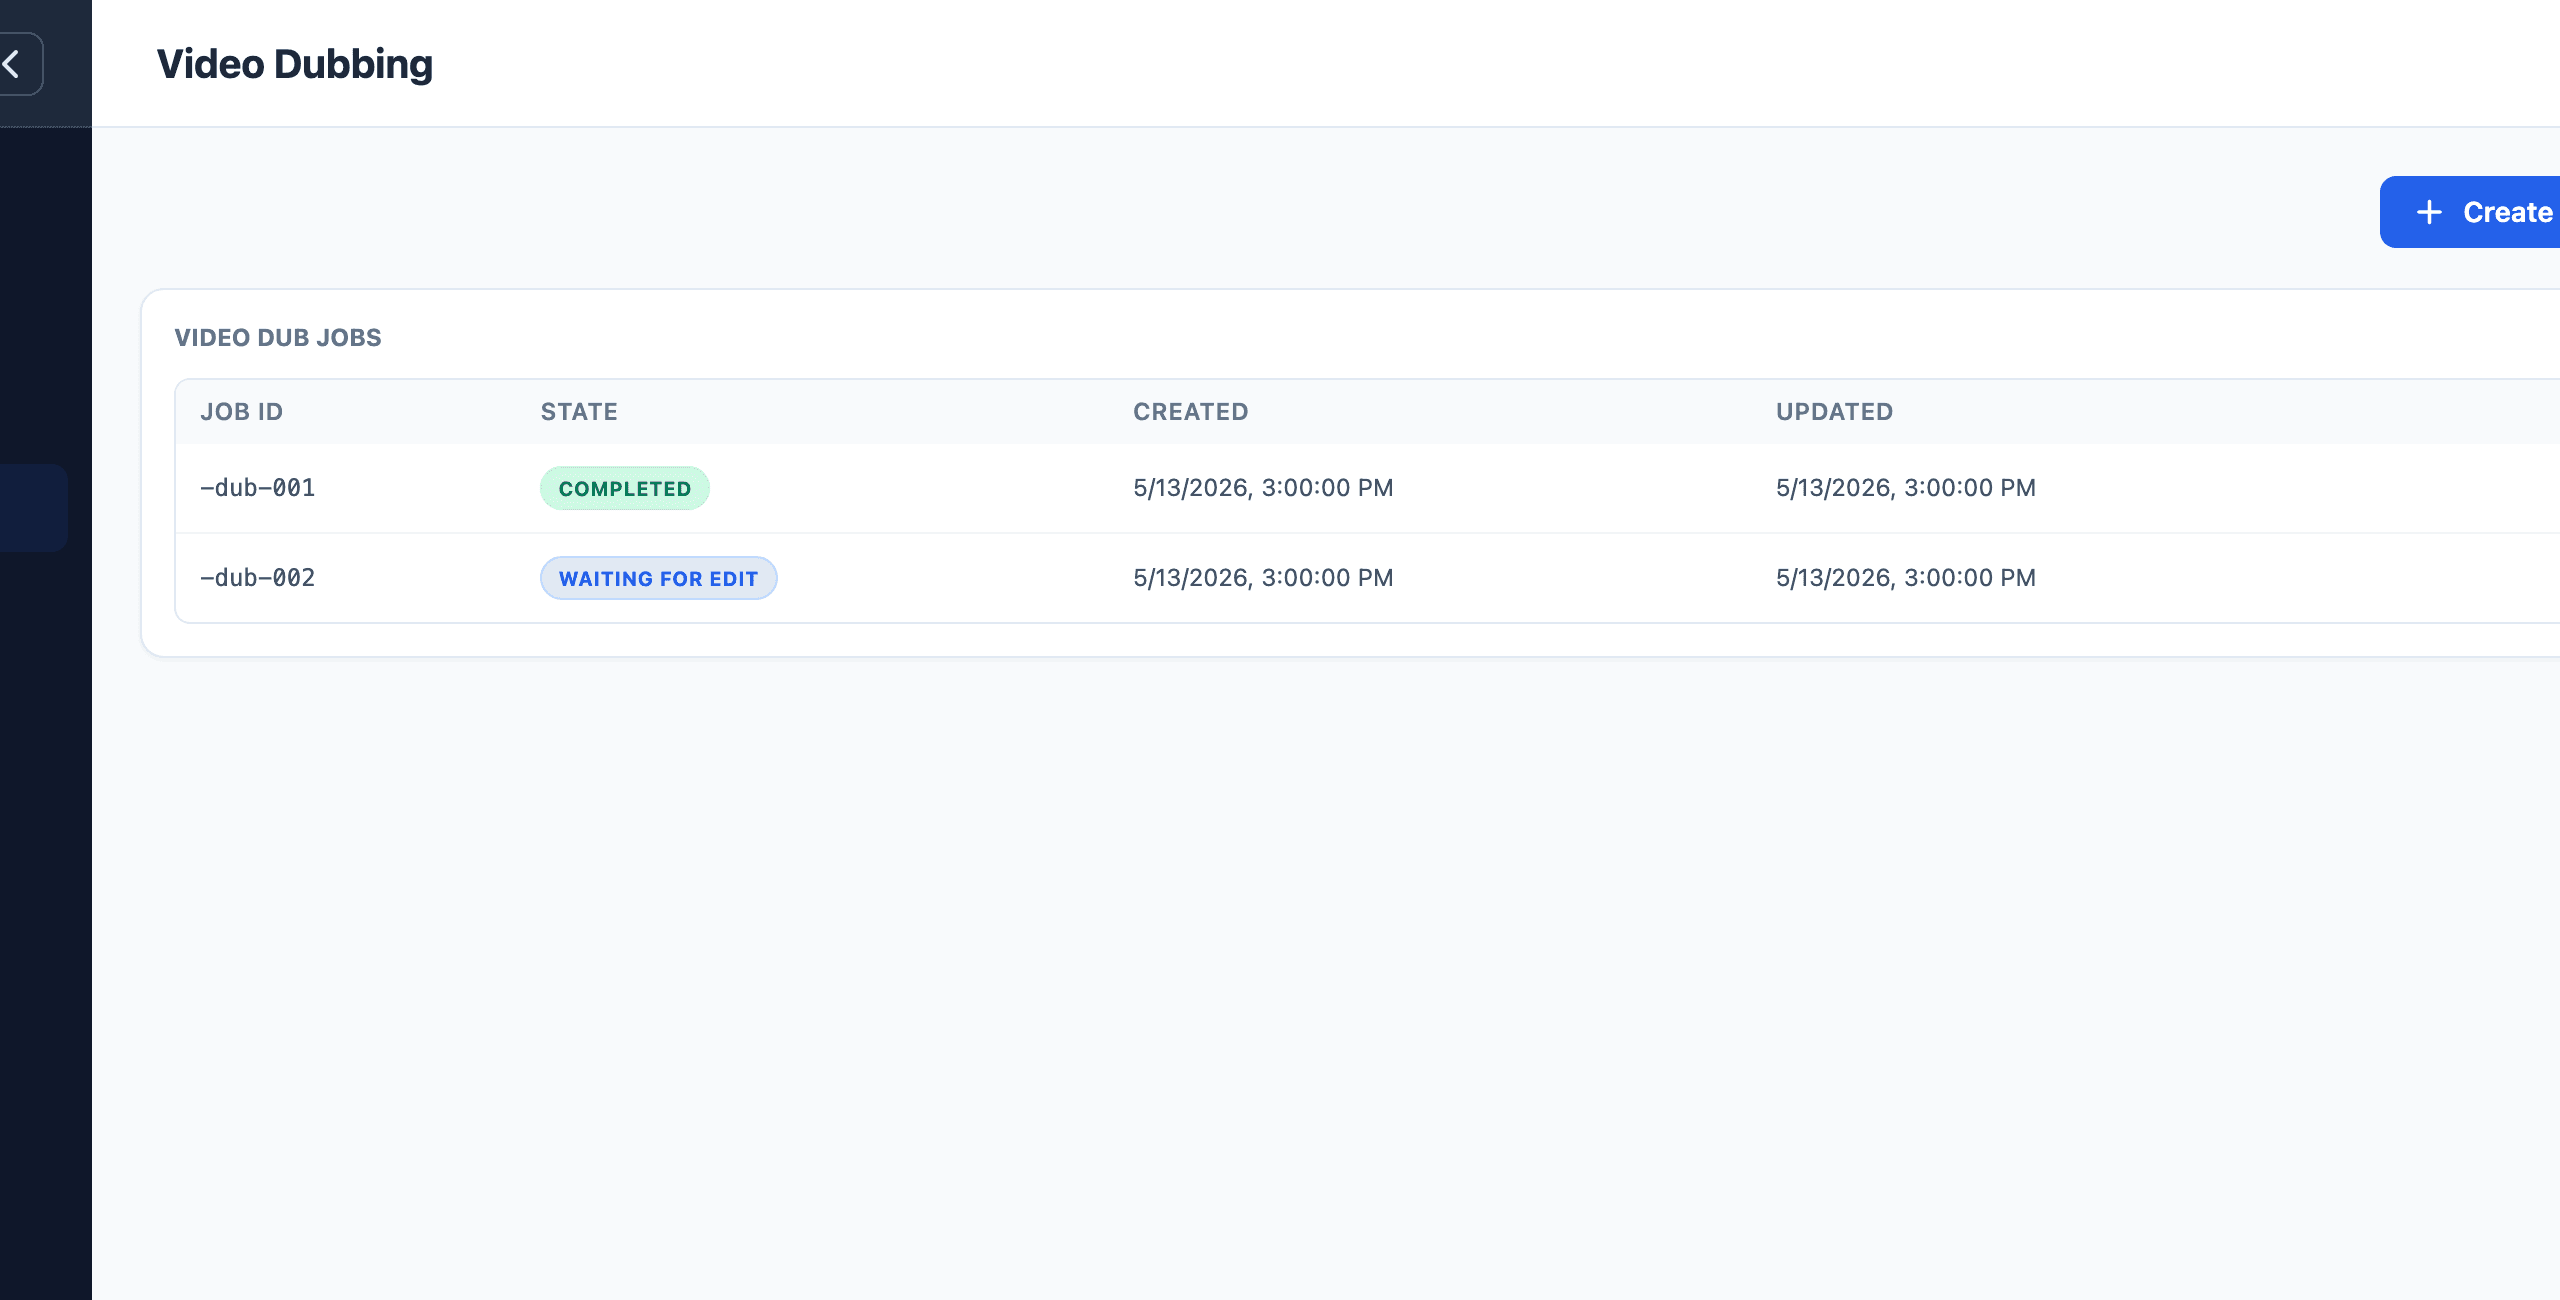
The job moves through preparation, transcript review, and rendering.
- Open the job from the job list.
- Review the transcript once it is ready.
- Correct transcript text before generating the final voice track.
- Save transcript changes.
- Continue to render.
- Preview the original and rendered media from the job view.
Spend time on transcript review before rendering. Fixing the transcript first is faster than rendering a bad dub and trying to correct the audio later.
Check timing-sensitive lines after editing. Short on-screen clips, fast speaker turns, and names shown on screen should be corrected before the final render.
Quality checklist
Before exporting or sharing the video, check:
- The transcript is correct before rendering.
- Source and target languages are correct.
- The voice matches the intended speaker or brand.
- Important on-screen names and terms are spoken correctly.
- The dub is not missing lines.
- Timing still feels natural around fast cuts, title cards, and speaker changes.
If timing feels off after editing the transcript, shorten long lines or split complex sentences before rendering again.
When to use this flow
Use Video Dubbing when the output needs to stay tied to the original video asset. This is the right flow for tutorials, product videos, lessons, clips, and narrated screen recordings.
Use Audio Dubbing when the output only needs to be an audio track.
If the job is blocked
Open Models and install any missing video and audio tools. Video dubbing relies on ffmpeg, ffprobe, speech recognition, audio separation, language translation, and the selected TTS model.
If the rendered video has the wrong language, voice, or wording, check the source language, target language, transcript edits, and selected voice before changing advanced settings.